

Last week, we got to work on a big project. The tile back splash.

We’d never tiled before so this otherwise “small project” felt even bigger to us.
There are already a ton of tiling tutorials out there, so we’re not going to attempt to rewrite the book on back splashes, but we did want to share a little about what we learned along the way.
We found simply following the instructions on the back of the thin set bag to be the most helpful. And we read several of these posts in preparation to get ready.
1. Getting a tile saw is totally worth it.

You can rent it, buy it, or borrow it, but unless you’re using tiny tiles (like penny tiles) that you can easily cut (or just remove entirely to fit around edges and corners), it is really, really better to have a tile saw.
Which brings us to lesson #2…
2. You don’t need an expensive tile saw.
We originally thought we didn’t need a tile saw because we weren’t using large tiles and we wouldn’t have that many cuts. We soon learned we had a LOT more cuts than we thought. But, we also didn’t think we needed a tile saw because we didn’t want to buy one because we thought it would be at least $275 for a project we were only going to tackle once.
(We didn’t want to borrow or rent because we knew this would take us at least a week, working only a couple hours each night.)
But, we found a small-scale wet saw at Harbor Freight for $55 (with a 20% off coupon that comes in EVERY week’s paper) and it was perfect for what we needed. (We did find out the saw didn’t come with a blade, so that added another $15.00, again with a coupon.)
Here’s the one we bought:

-Subnote: Wyatt learned a few tips and tricks about using the tile saw. He’ll be back to share those soon. It was our first time using it and we were really impressed, but there are some important things to know.
3. There will be more cuts than you think.
In addition, we didn’t expect how long it would take to plan and layout the back splash cuts. We had 1 double interior corner, 3 single interior corners, 3 double exterior corners, 1 single exterior corner, and 2 full exterior sides on the long strip behind the range hood, not to mention some top edges that will show in the window. Plus a bunch of outlets to cut around.
That’s a lot of special edges and cuts.
Laying everything out and making most of the cuts before hand really sped up the process of actually tiling the back splash because once we mixed up the thin set, we were ready to go without a lot of stops. But, that meant we had a LOT of prep work to do and a lot of cuts to make.

Especially because the tile that we chose came in sheets, which made it faster to put up, but did not have any finished edge pieces for corners and edges that would show. See the difference in the two tiles below. We decided pretty quickly the raw edge wasn’t going to cut it for us.

We spent a good amount of time in Home Depot (We found their tile options to be cheaper than Lowe’s, but basically identical.) to see what our trim options were for matching tile.
The good thing is that we found several options. The bad thing was that none were exactly the right size so we had to cut them down to fit.

A few minutes (hours?) with the tile saw later, and we and the tile saw was really, really helpful in this.
See the difference? Much nicer.

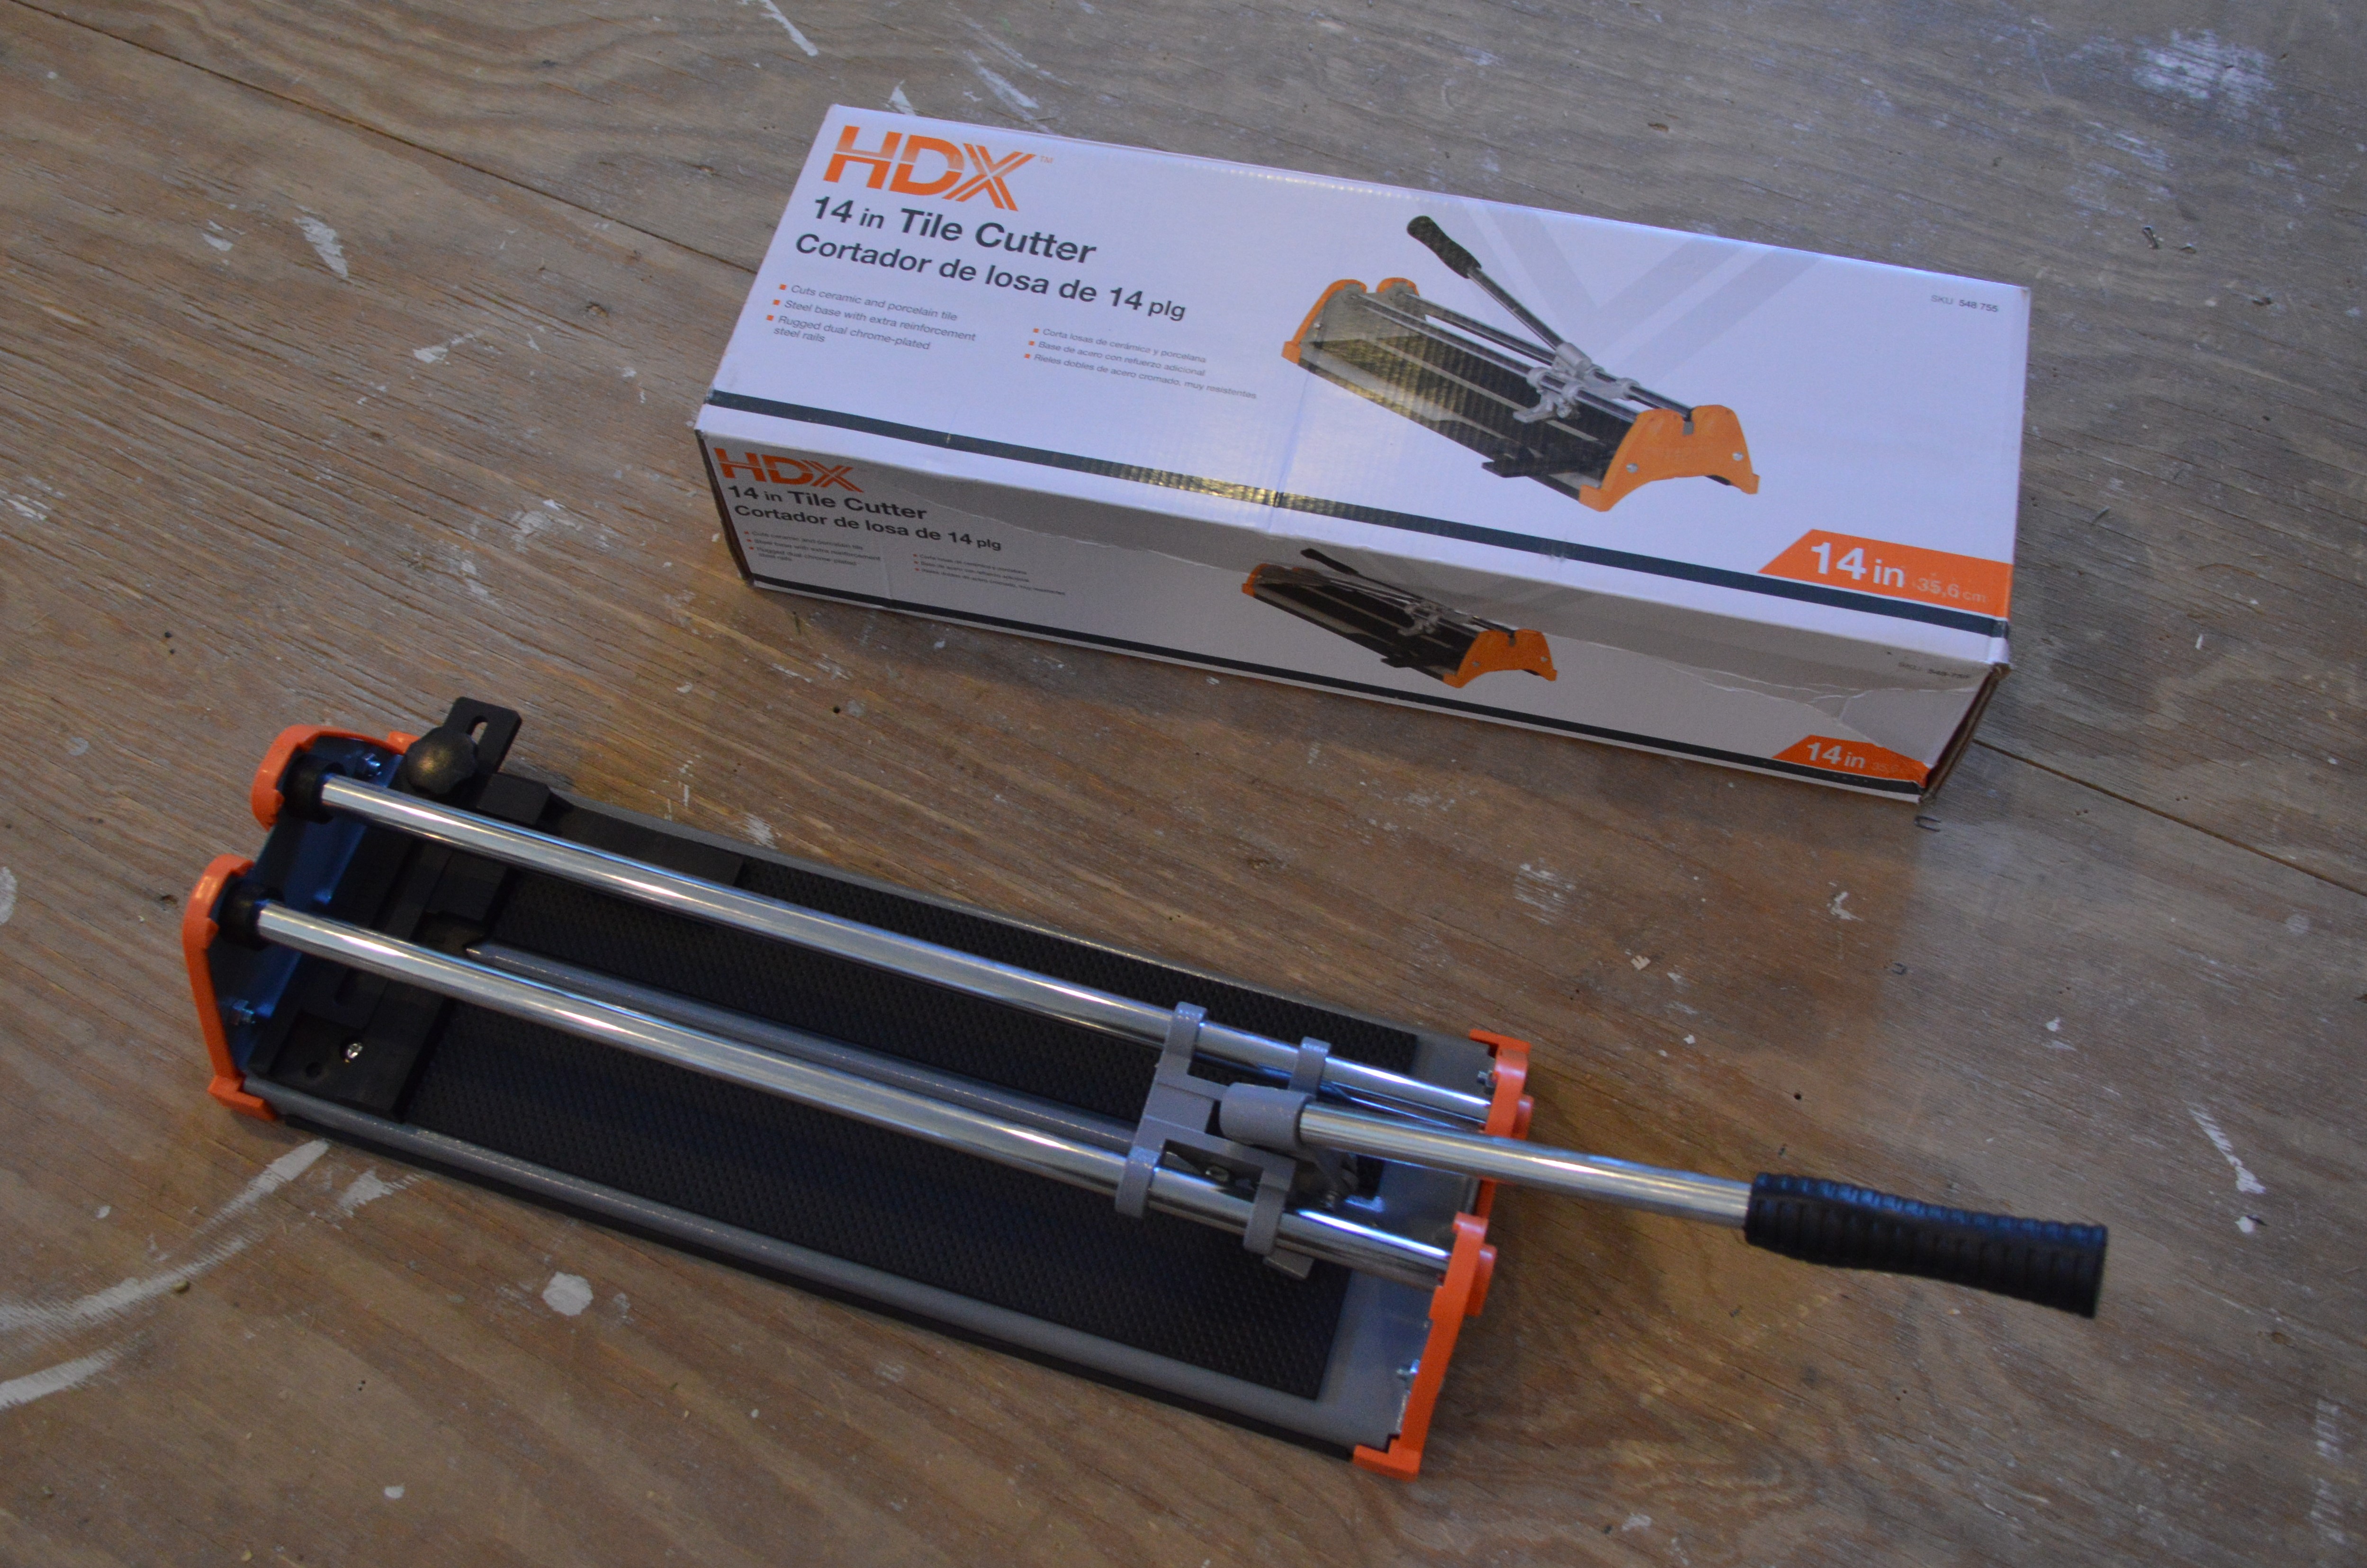
4. (Sub lesson) Using the tile cutter is a good option for easy cuts.
On tiles that just needed to be cut in half or close to half, we could use the tile cutter we originally purchased when we thought we didn’t need a tile saw. This 14″ cutter was plenty large for the tiles we were cutting, and it did a good job for splitting tiles in big pieces. Plus, it’s faster and neater.
It was less than $20 from Home Depot.
5. Buying a sanding block is a must.

We used the sanding block, at first, to even up any uneven edges from the tile cutter. Then, when we started using the wet saw, we realized, after a few cuts, that the blade left the edges of the the tile very sharp. So, we carefully handled them until I had a chance to go over the cut edges with the block.

We also had to clean the tiles after cutting them with the wet saw because, let’s face it, no one wants to put a tile that looks like that on the wall, right?

We still have several tips to share, but this post is already over 800 words long, so if you’re still reading, it’s practically a miracle. We’ll be back tomorrow with part 2 of this tile tips series, so in the meantime, here’s a teaser of our finished result:

Three cheers for tile!
What lessons have you learned? If you have any great tips, be sure to leave them in a comment below and we might include them in our list tomorrow!


Looks so great already!! Can’t wait to see it done!
Thanks! (And it looks awesome, can’t wait to show you all!)
Great job! Thanks for the tips… I agree, a tile saw is so worth it! 🙂
For sure! We’ll be back with more tips later today, too!
We picked the same time for our backsplashes!! Well different colors, but same tile. I think it was a lot more work with the the larger tiles than smaller ones just because you have to make so many more cuts to make everything fit. But so worth it – subway tile looks awesome!
Yes! I really liked your backsplash, too. Yay for subway tile!