

As part of the kitchen/floor/never-ending remodeling project, we wanted to replace the stair railing with something a little more sturdy and functional. Melissa had the idea to turn the area into built-in bookshelves with a railing on the back. I was a little skeptical at first, but she convinced me it would work, and I knew I could build it pretty easily.
After all, the current bookshelves were about to explode in her office.

If you remember, the railing area started out looking like this:

Here’s another angle:

After telling me what she wanted, I came up with this plan using a free program called SketchUp:
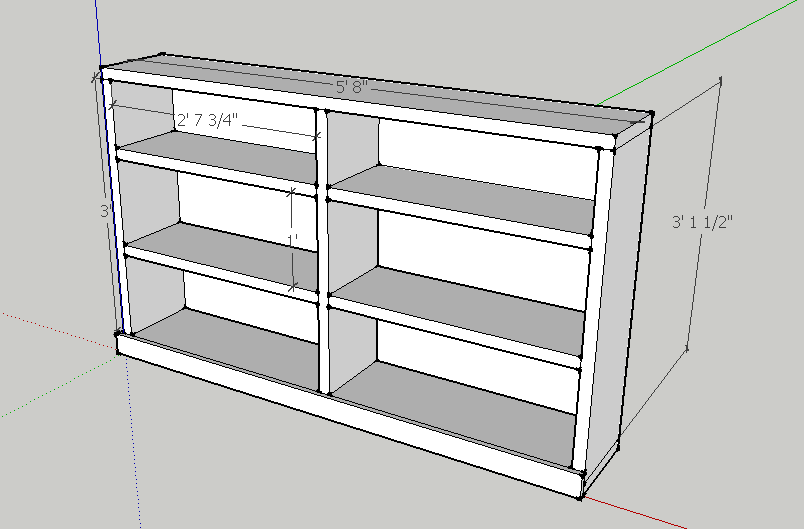
If you wanted to do this project at your house, I’d suggest just measuring the existing area and planning your bookshelves to be that size. We altered the size a bit to accommodate for the trim at the bottom on the shelves and to make each shelf spaced evenly. Feel free to ask if you have questions on how to do this.
To get started on the actual project, I took the railing all apart when we were demoing for the new flooring.

After removing the railing and post, we took a break from this project to put the flooring in. In the meantime, we bought the wood we were going to use and let it start acclimating to our house.

When it came time to start building, I started by cutting all the of the pieces to length and width according to my plans. I did some initial sanding at this point to clean up any major imperfections with my grandpa’s old belt sander.
I used a half lap on the center divider for both shelves.

This is a similar process as I used for the pantry, which I’ll discuss in more detail later, and the farmhouse table last year.

If you have more questions about this process, feel free to ask.
Then, I glued and screwed all joints, using clamps to hold everything in place.

The plan called for putting a face frame on the front and backing on the backside, so I took that opportunity to use my Kreg Pocket Hole Jig for joining everything together on the sides facing the front and back since the holes wouldn’t show in the finished product.

After the main pieces of the bookshelf were put together, I made the face frame. I cut and pocket-hole-screwed each piece to make sure it lined up exactly with the shelf. Then, I glued and nailed the face frame to the bookshelf and let it all dry overnight. Melissa didn’t get any pictures of this process but it was the same process I used for the pantry boxes, so a photo of building those faceframes will help illustrate the idea.
Basically, a frame made from 1 x2’s sits on the front of the bookshelves frame and hides the end grain from showing and provides a nice square edge instead of the slightly rounded, imperfect edges the boards have.

At this point, there were some gaps and joints that weren’t flush since we were using cheap framing lumber (2 x 12’s). We planned to paint it white, so to fill in the gaps and joints, we used wood filler.

After filling and letting it dry overnight, I sanded everything down and we were ready to paint.

We used 2 coats of primer and 2 coats of the paint that matches the trim. Finally we were ready to get these shelves installed.
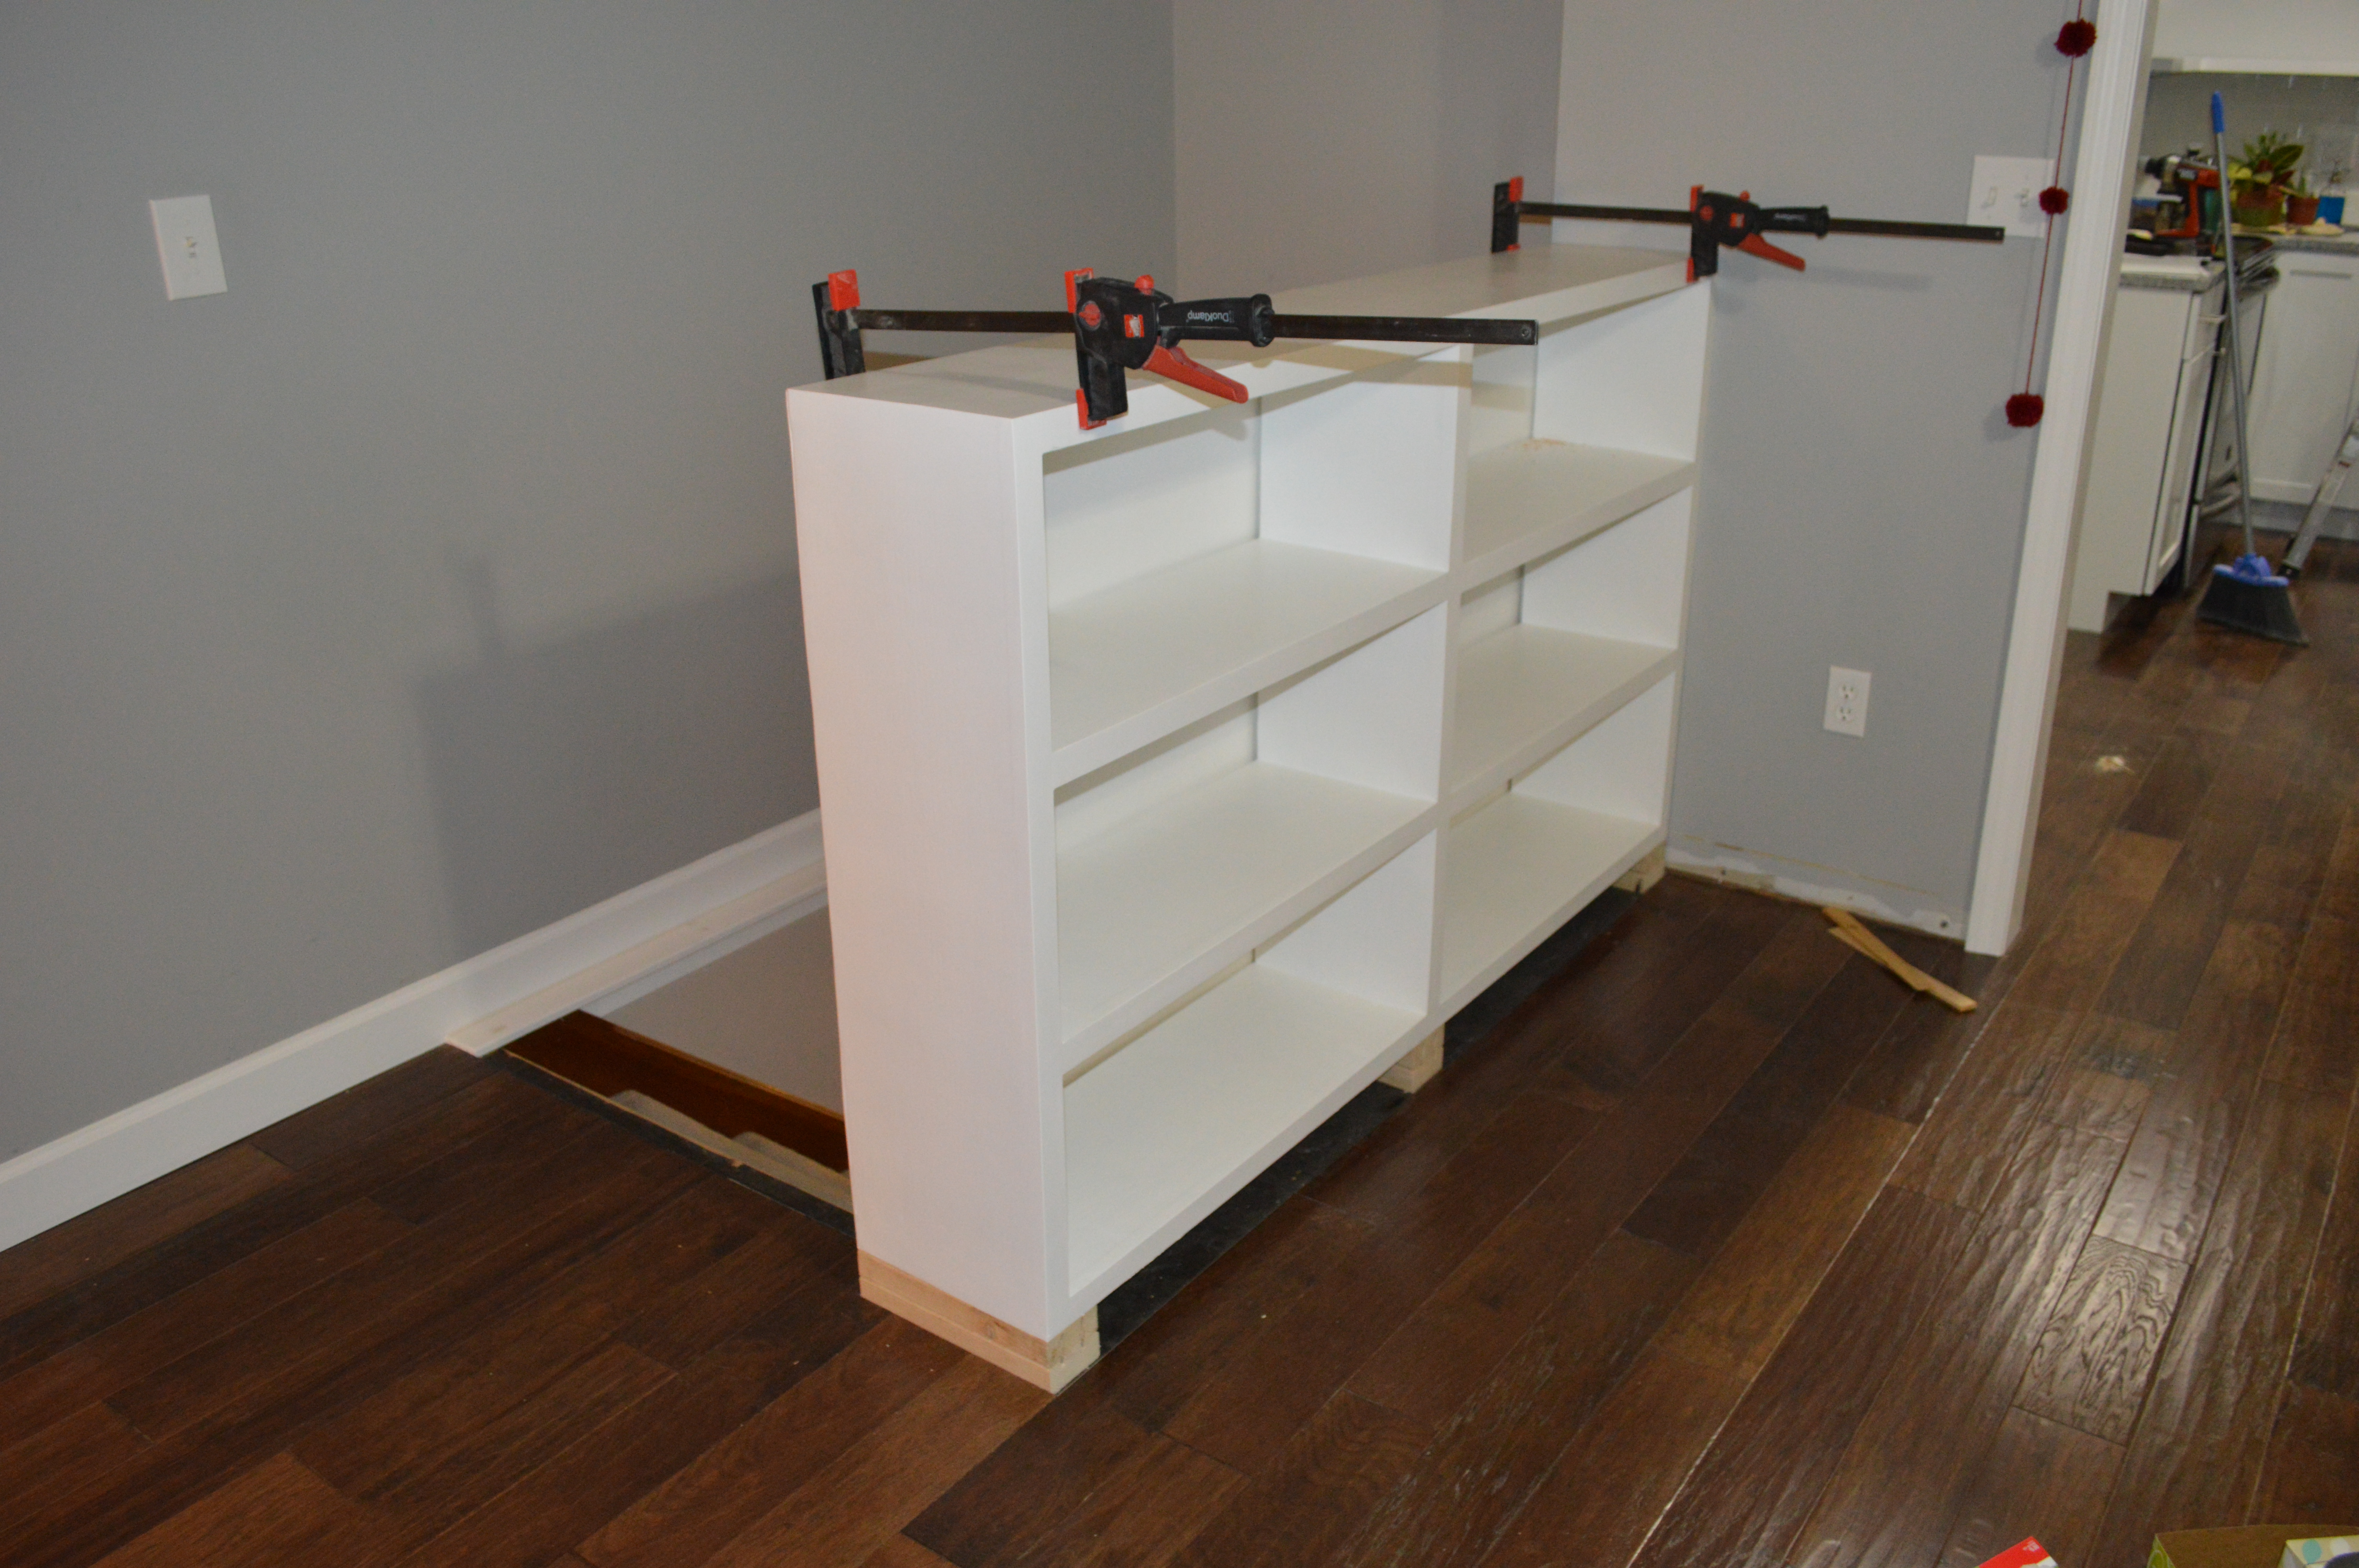
To achieve the built-in look, we needed the bottom shelf of the bookcase to be just above the height of the trim, so my friend Jeremiah came over to help move the bookshelf around and attach some blocks to raise the bookshelf, as it was too heavy for Melissa to carry.
After adding the blocking, we carried it in and sat it in place. I attached it to the floor by pocket hole screwing the attached blocking to the floor and screwing into a stud in the wall the bookcase rested against. You can see we left the flooring unfinished where the built-ins would sit. This helped us avoid wasting the expensive flooring and prevented the shelves from being any higher than they needed to be.
I was already concerned about the shelves feeling too big in the space, even though Melissa said she didn’t care how high they ended up being.

I had to use shims to help level everything out and make it sit flush with the wall.

I intentionally waited until this point to attach the backing. It made it easier to carry and move around. Melissa had already painted the board that was pre-cut to fit in the basement.

I used my grandpa’s finish nailer to attache the backing, using clamps to hold everything firmly in place.

At this point, it was really taking shape and we got excited about the finished look.
I filled the holes, sanded them, and touch up painted them. Melissa was concerned about the backing looking cheap and thin so we made sure to caulk and paint the seam to help it blend in to the overall piece instead of looking like an afterthought just attached on the back.

The side view also lets you see a hint of the face frame, if you’re really looking for it.

The backside of the base had some weird trim issues presented by the existing trim that had been used by the builders on the original railing. We tried to work those pieces into the design and managed to make things look pretty good, even if it’s a little odd upon closer inspection. There is still a small gap we need to cut one more piece of trim for on the back, but it isn’t noticeable unless you bend down and look closely. We’ll tackle that after we finish our holiday break.

Once everything was attached, I cut and installed the same trim that is around the rest of the room. Melissa added wood putty to the nail holes and gave everything one final coat of paint. You can see how it makes it look built in the house, like it has always been there.

Then, Melissa rushed to fill the space with some leftover Christmas decorations and get everything ready for the party. She’ll move into these for real after we clean up all the holiday decor.

Again, it’s crazy how much the overall look of the room changed when we went from this:

…to this:

Talk about a transformation, right? I was a little worried about it being too big and closing off the room. But now that it is finished, I think Melissa’s vision was right on. Ever added built in features to your house? I think Melissa is hooked on this now. What do you think?
UPDATE: Click here to see how these shelves look now!


Love it! Wyatt, you are great at building stuff and making it look very nicely finished.
He says thanks! 🙂
Good job, glad you’re making use of his tools!
We keep them pretty busy!
That looks AMAZING! We may have to steal your idea a bit and try something like this in our home soon! Happy New Year!
Feel free! I’m sure you’ll love the results!
Melissa’s vision and your woodworking skills=awesome projects. Glad you could use some of Dad’s tools making your home so beautiful.
Thanks!
Hi! We are doing a similar project. How did you attach the bookcase to the blocks underneath? It doesn’t look like its screwed in, is it? Thanks!
Thanks for stopping in! We screwed the bookcase to the blocks and then screwed the blocks into the floor joists (not the subfloor) with pocket screws. Does that help?
Hi, great work! Thank you for sharing. How did you do your half lap cuts? I’m thinking of making my design similar to yours.
Hi Eugene, thanks for stopping in.
I think I marked them with a combination square and then made the cuts across with a circular saw. Then I either used a jig saw or chisel to clean up the 1 1/2 inch edge. The chisel and hammer approach should be easy since the grain has need sorted to about 1 1/2 inches. Just don’t go for it all at once, sneak up on the final line.
I don’t think my table saw blade was big enough to use it like a dado cut, and the boards were too long to safely hold. But that work have been an easier method in other circumstances.
Good luck, keep us posted on your project!
-Wyatt